Basement window exits
By Nathan Pocock
Features Hot Topics Structural TrainingTechniques for a successful self-rescue from basements that are partially underground
 Halligan Step 1
 In many districts we find buildings in our first due with basements not fully underground. Not having the basement fully underground allows for builders to install windows for natural light in this space which can interpret to small windows with sill heights inside the basements anywhere from five to six feet and higher.
Likewise, these basement walls now sticking several feet up above grade on the outside means windows to our ground floor level of the house will be elevated a similar height up above grade. One thing I have always enjoyed about most RIT training and self-rescue training is that a lot of the skills are skills we can use in everyday fire fighting as well. I’ve never had to use these skills for my own self rescue from a basement, but I have used several of these techniques for smells and bells along with some first aid calls. The techniques were used to gain access through open windows rather than need to do any damage to the resident’s property. I was able to get in quickly to then go around and unlock the front door from the inside to allow the rest of the crew in.
Before we can exit any basement window we must first clear the window of all glass and frame to increase the space for us to exit. Make sure to clear all glass to prevent injury and remove any sash to give you maximum space. If using for access and not egress, such as mentioned above for non fire calls, there is no need to break the window if the opening is large enough.
We will show several step-by-step methods for these techniques in this article.
Halligan Step
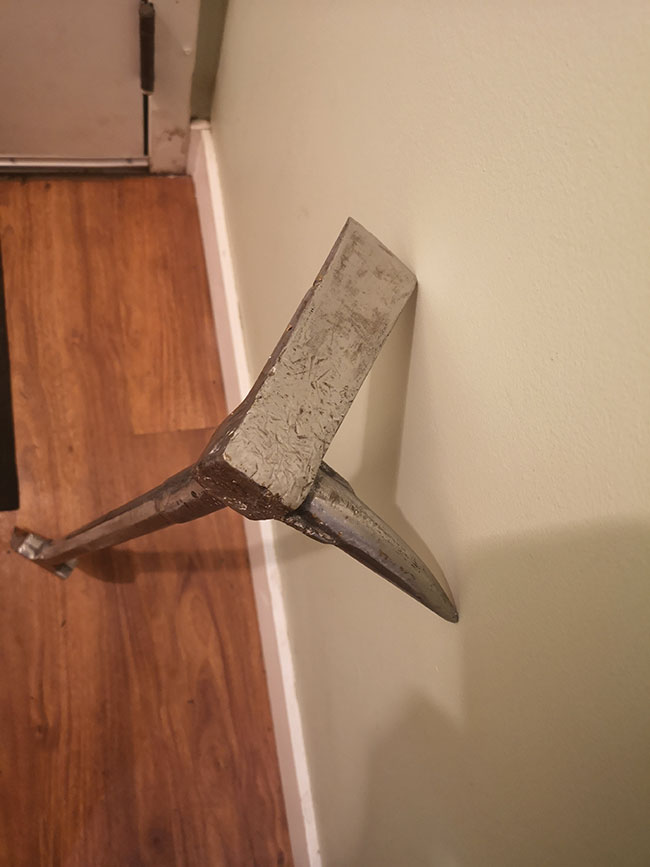
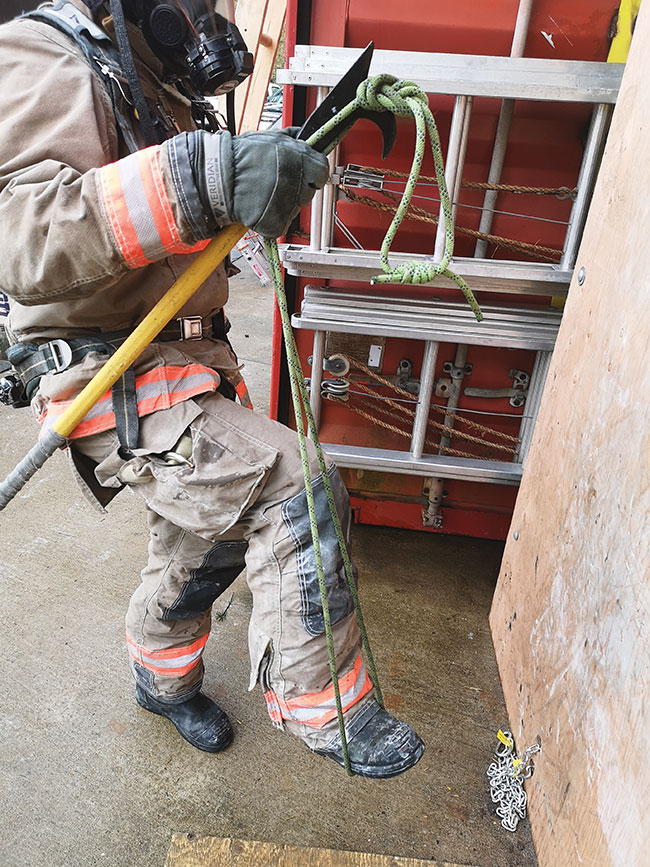
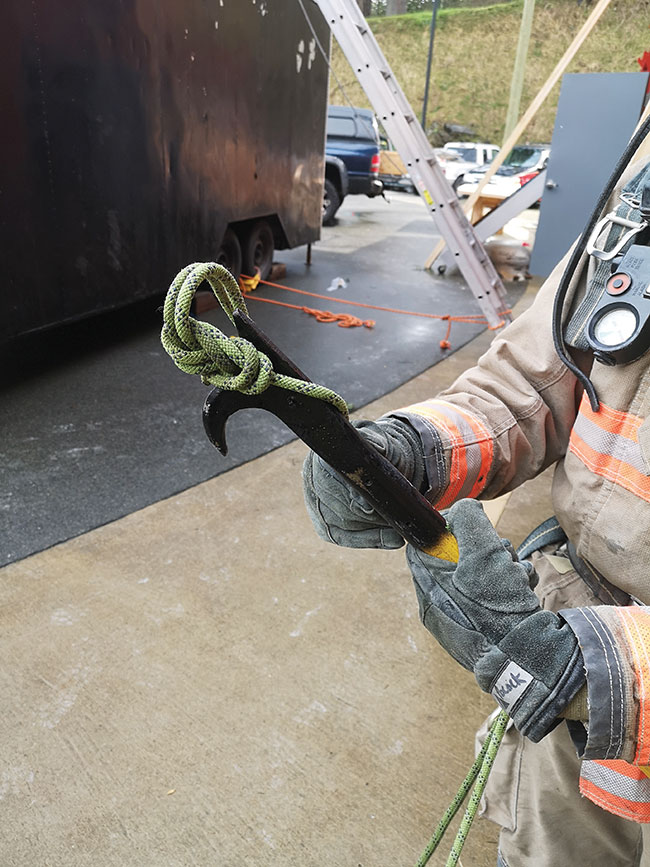
One of the quickest and easiest techniques is the Halligan Step. Here we use the halligan to give us a step up out the window.
- Use the forks of the halligan and strike hard down into the floor to chip and/or indent into the floor eight to 12 inches off the base of the wall. This indent will allow the forks to sit into this notch and not slide out from under you once you put weight onto the halligan.
- Now that the forks are secured, lean the adz of the halligan against the wall, firmly allowing the pike and adz of the halligan to bit into the wall and helping prevent side-to-side movement.
Make sure that the pike and adz are both resting against the wall. This makes the adz end most stable so that it does not roll along the wall. - Step onto the adz and push yourself up and out the window. If you are doing this for access, you can girth a piece of webbing or rope to the bar and bring the loose end out of the window so you can retrieve your tool once on the other side. For self rescue purposes, there is no need for us to tie this retrieval rope/webbing to the halligan tool as we can replace a tool if you need to get out.
Halligan Step 2
Cordage and/or webbing
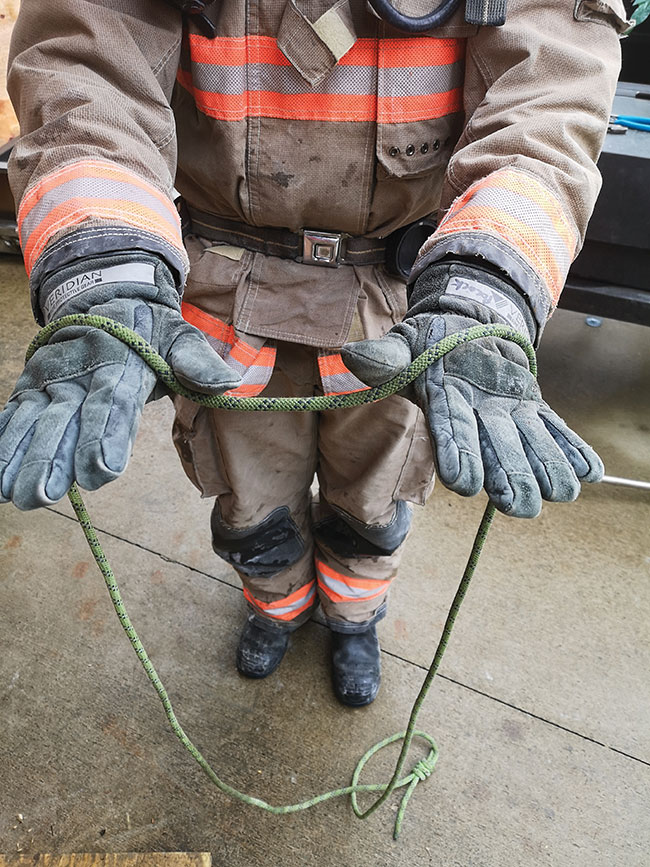
For this technique we use a piece of cordage or webbing to get our needed step up for the exit from the structure. In the pictures below we are using a 12 foot length tied in a loop which I carry as part of my personal kit in my turnouts along with my 25 feet of webbing.
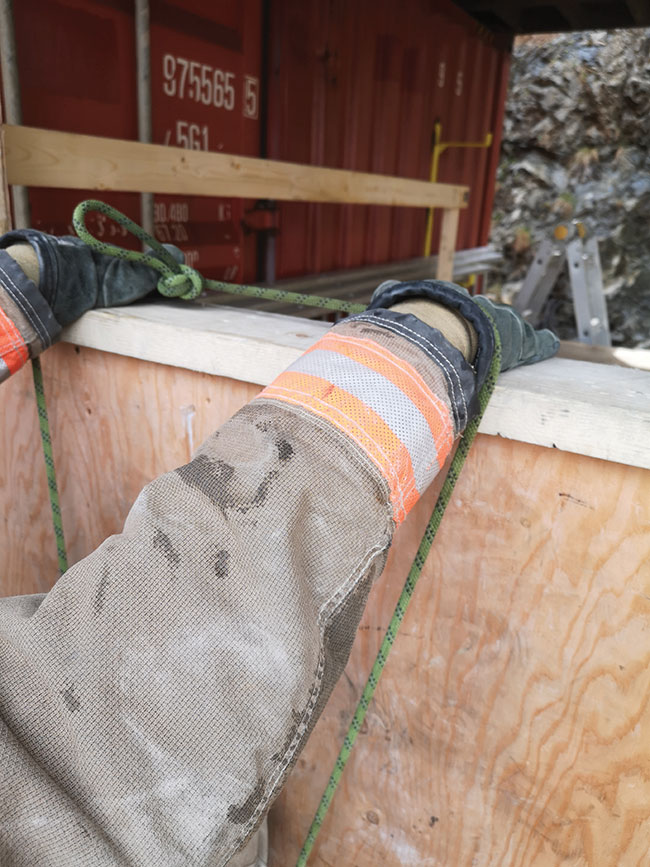
- Take your cordage out and place it across the back of both your hands holding it out in a loop. Make sure the rope sits across the back of your hands to let that take the bulk of the weight while your thumbs prevent the rope and/or webbing rolling back onto your forearms.
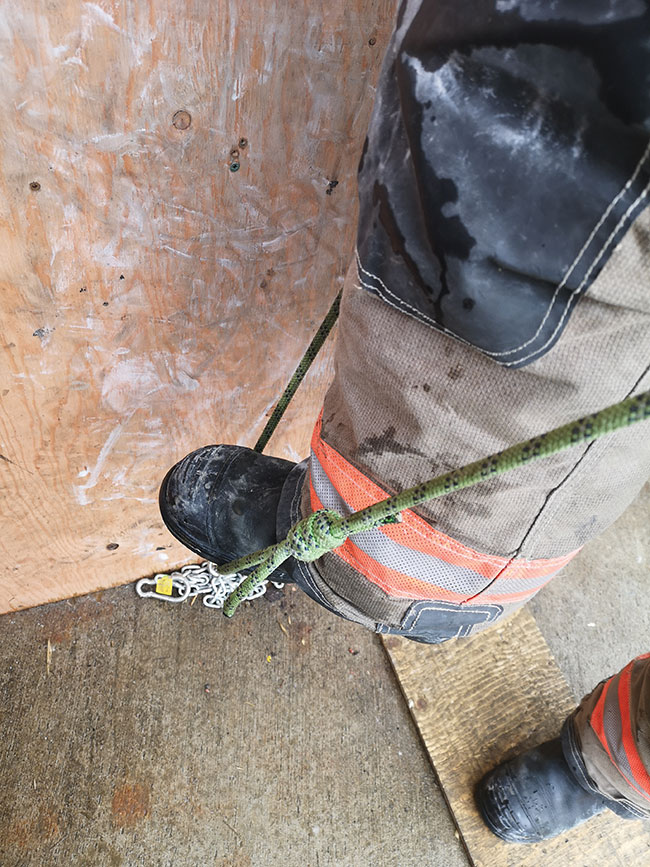
- Place your foot into the rope having the rope sit on your toe back enough so as not to slip off while not allowing the rope to slip into the instep of your boot.
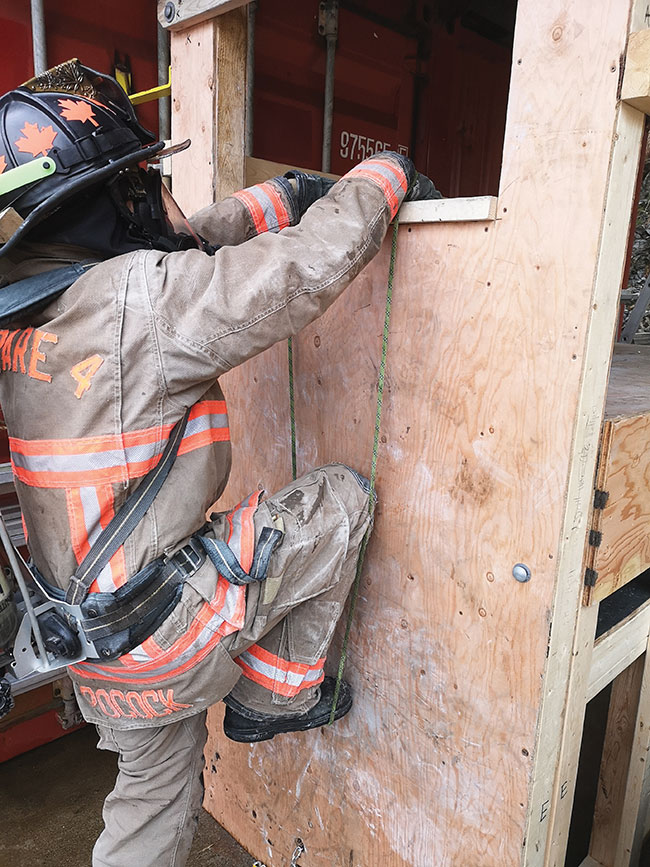
- Place both your hands up onto the sill moving your hands further apart to bring your foot higher or together as needed to allow your foot to stay in the rope.
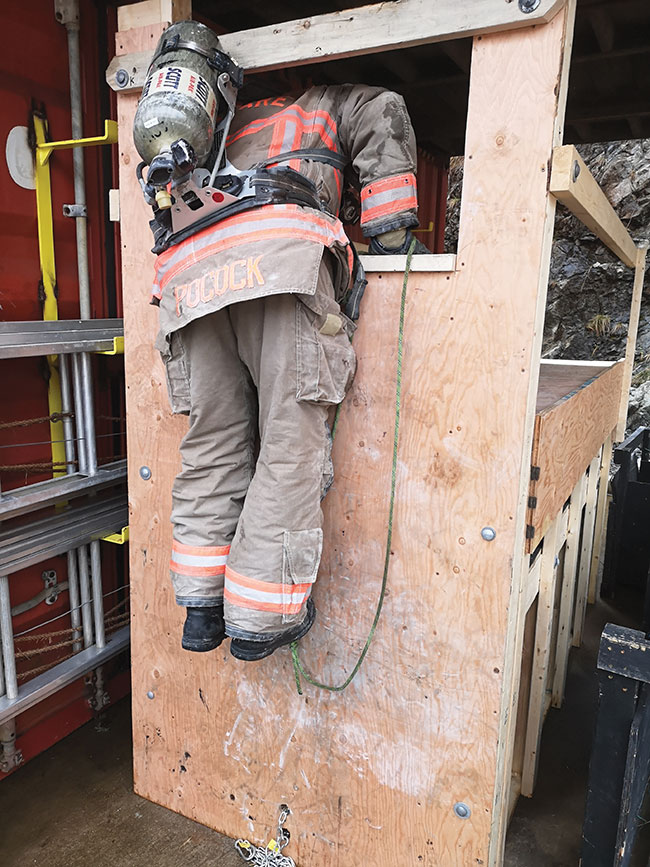
Remember you want to aim to keep your knee uncomfortably high, higher than where you could simply just place your foot up into the rope. It is important to pull your foot higher than the point you could just place it. Each inch counts in this drill. - In an explosive movement kick up on the rope allowing your hands to take the weight on the back of your hands and transition out of the window.
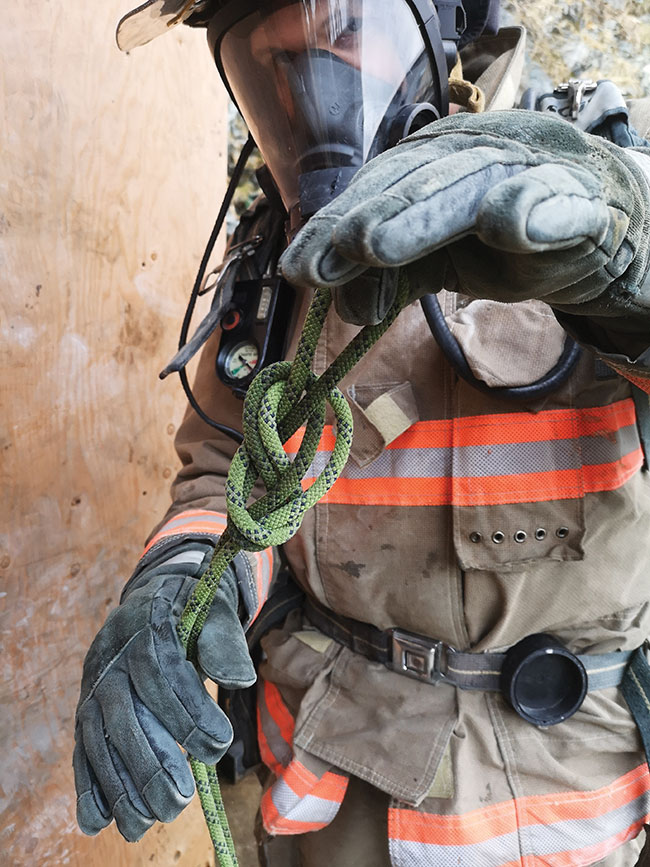
If your rope or webbing is too long and you cannot spread your hands wide enough to bring your knee high enough, you can tie a knot into the line to shorten the loop, which you can then place your hands into and step up accordingly out the window.
Cordage and/or webbing 1. photo credit Nathan Pocock
Cordage and/or webbing 2
Cordage and/or webbing 3
Cordage and/or webbing 4
Cordage and/or webbing 5
Cordage and/or webbing 6
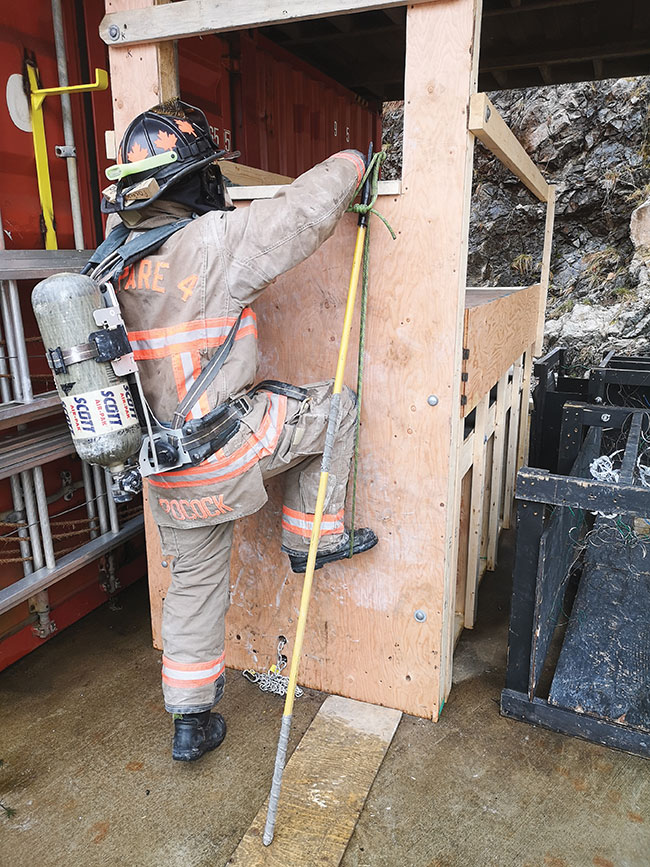
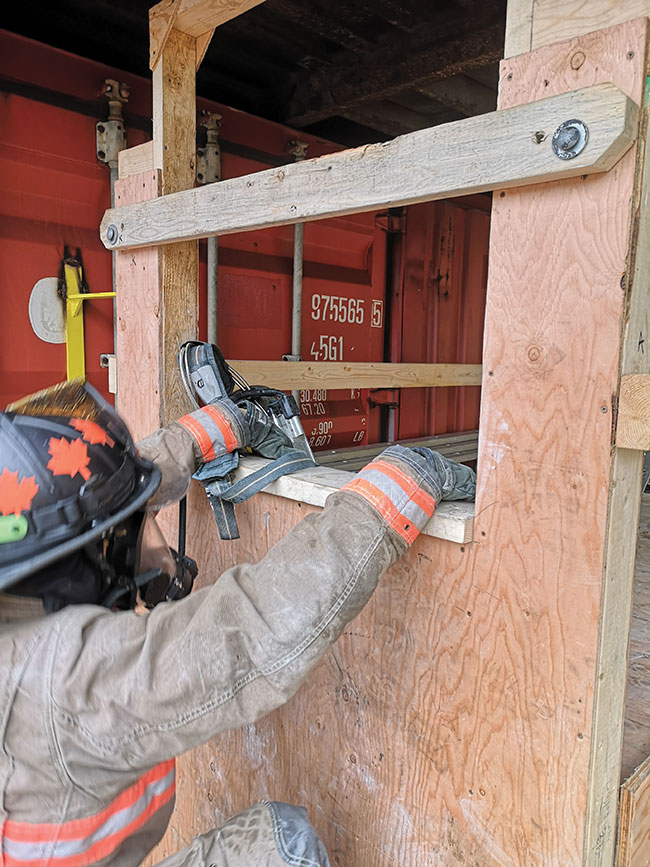
Pike pole and webbing
Here we use a piece of webbing or cordage along with a pike pole. Students usually find this technique a fair bit easier that just plain cordage as discussed above as both your hands are still free to continue to pull up.
- Measure out the length of webbing needed. Place both hands at the top of the sill and pull up the rope until it gets to the top side of how high you can get your foot on the wall and then tie the knot to make the rope slightly shorter than that. Remember we want that knee uncomfortably high.
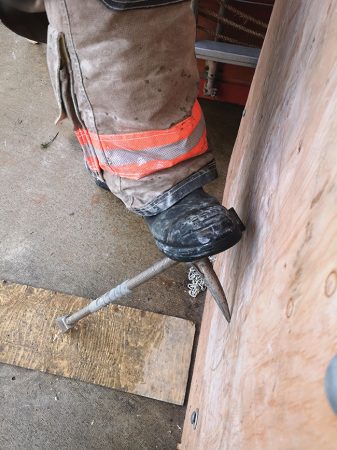
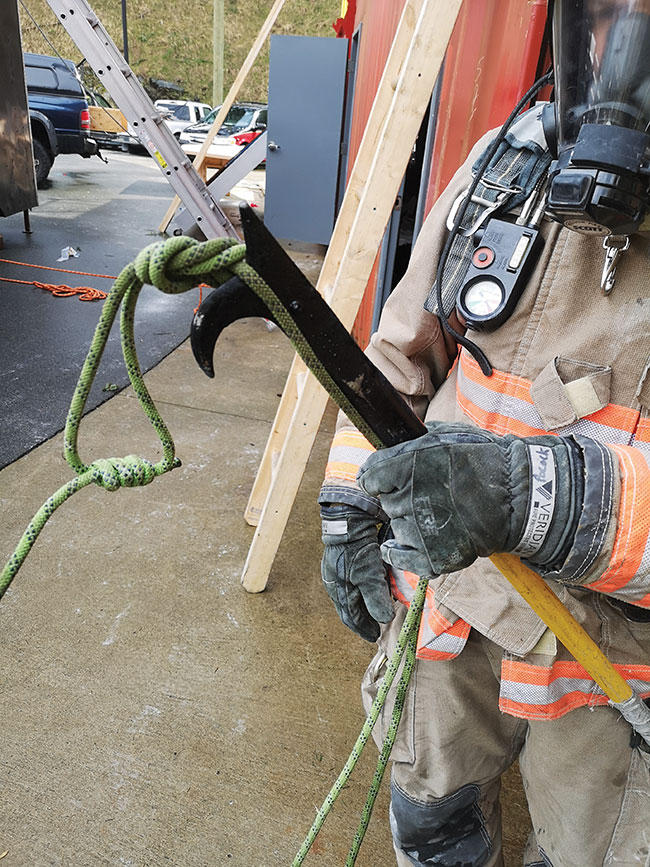
- Make sure the rope is placed over the front of the hook. Do NOT put the rope over the hook from the back side or when you step onto the rope it will twist the head of the pole and rotate it off the sill. (See pictures in bottom left for both examples).
- Grab the rope and pike pole together in one hand, place your foot into the loop and then push the pike pole up onto the sill, on an outside edge.
- Once the pike pole is in place drive straight up in the rope making sure not to kick outwards as you go up. This technique will work with any length pike pole even a two foot one, it is the downward force of the hook pulling down into the windowsill that keeps it in place as you step up. If you kick outwards with your foot it will pull the pole off the sill.

Pike pole and webbing 1. Photo: name tkherious
Pike pole and webbing 2
Pike pole and webbing 3
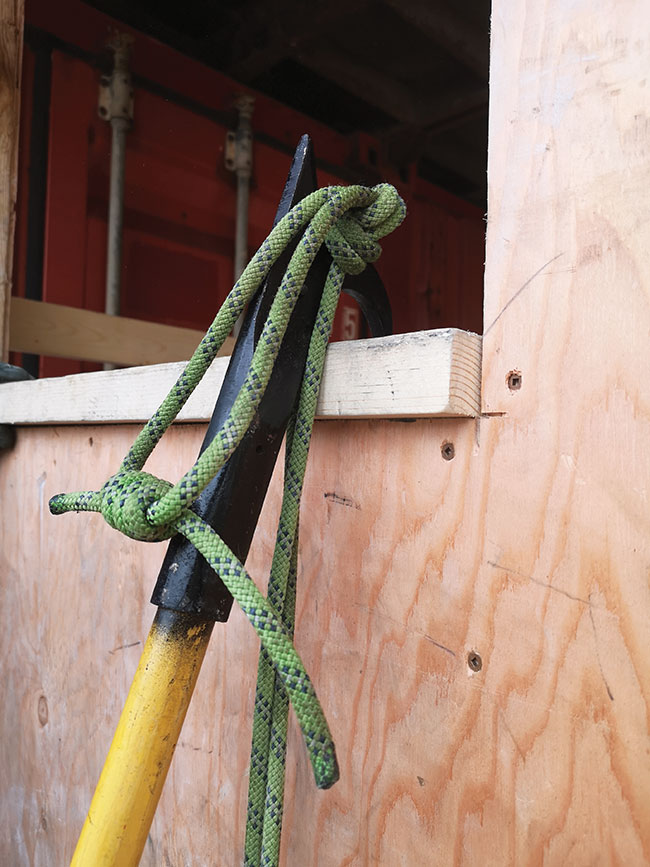
Correct
Incorrect
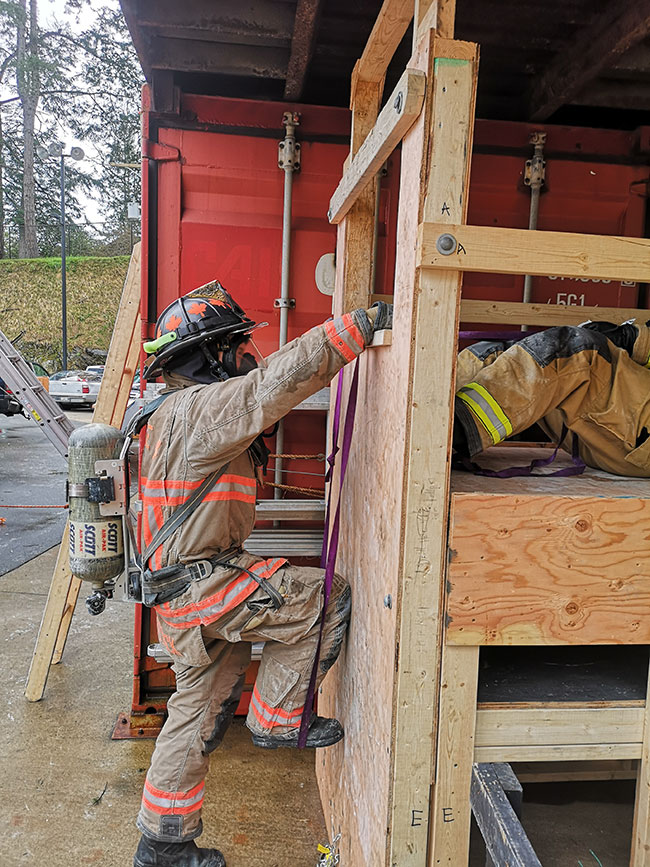
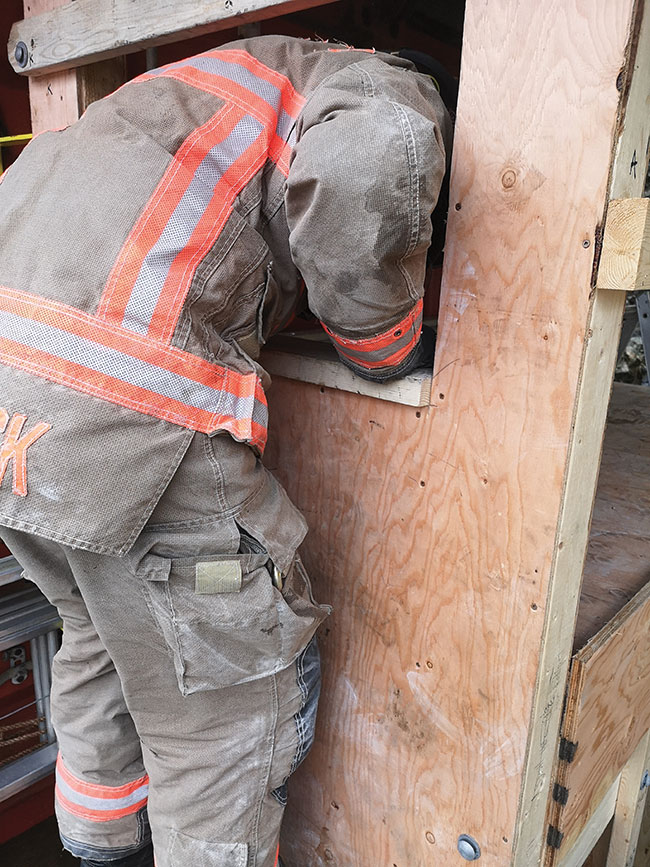
Two firefighter and webbing exit
In this technique, you use your 25 feet of webbing or any other webbing long enough along with another firefighter.
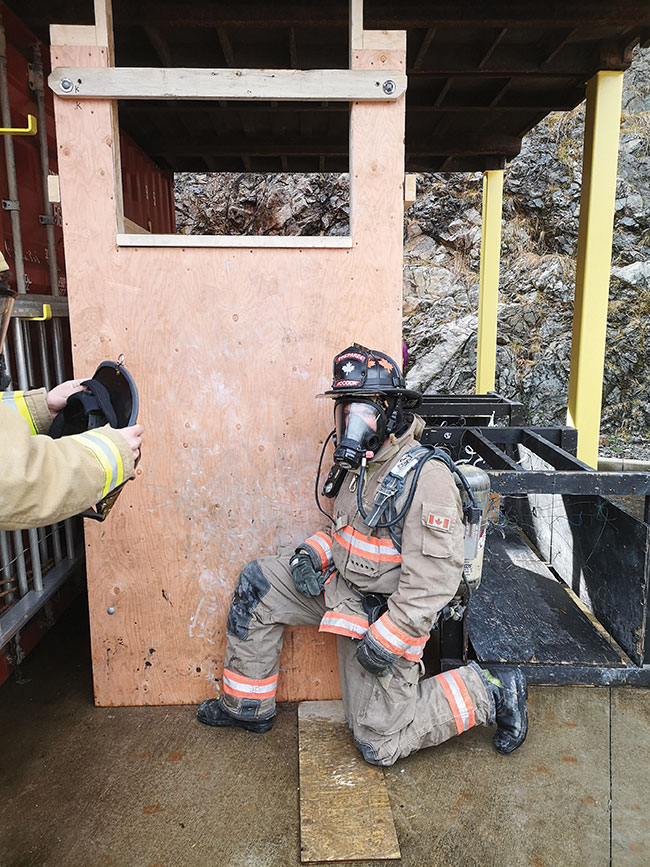
- The first firefighter positions themselves one knee down one knee up at the wall under the windowsill. It is important that the knee up is the knee against the wall for two reasons.
One, this puts the knee in a more stable position so that it is not kicked out when the second firefighter pushes off to get up and out the window. Two, it gives the second firefighter the greatest height advantage out the window. Putting the outside knee up places it farther away from the wall, thus furthering the distance from the knee to the window.
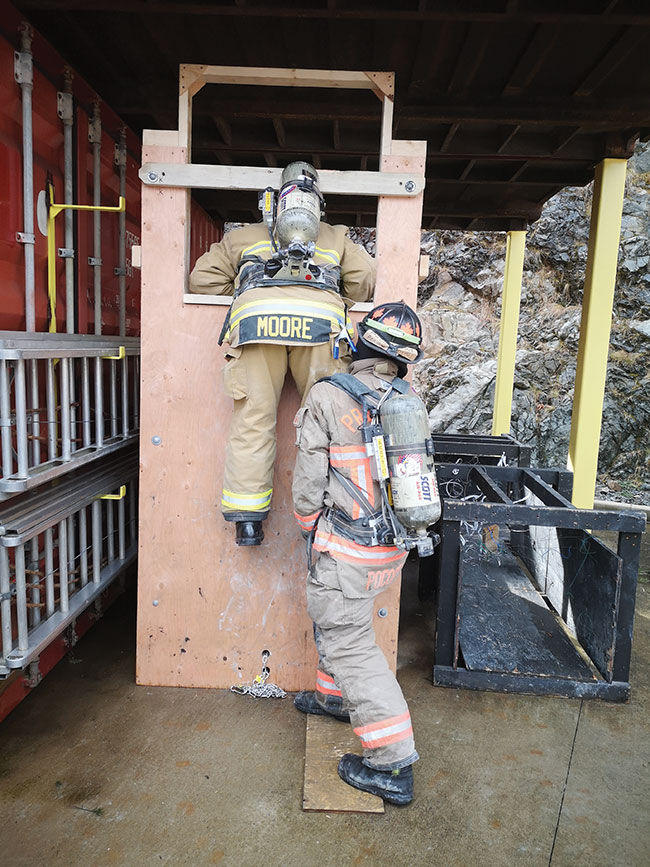
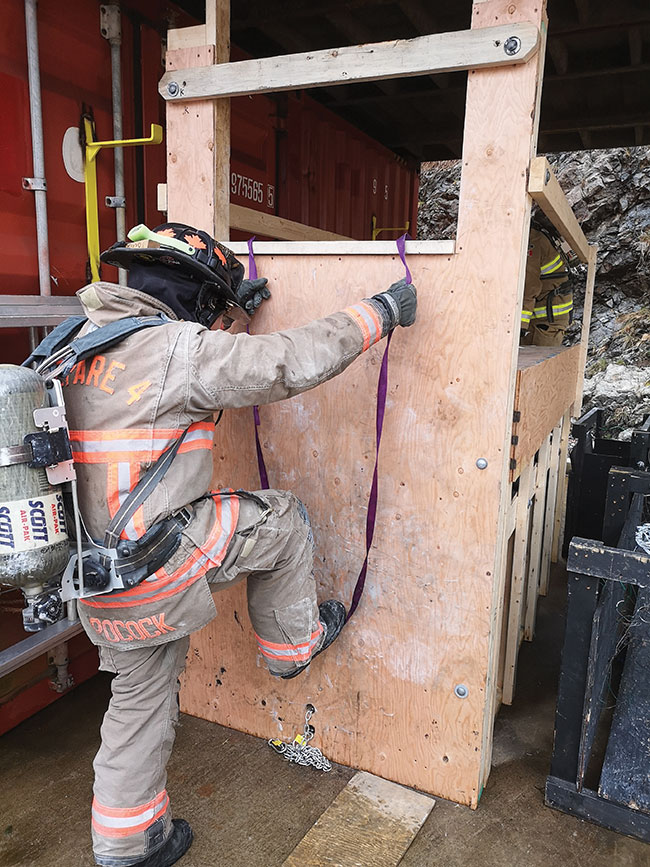
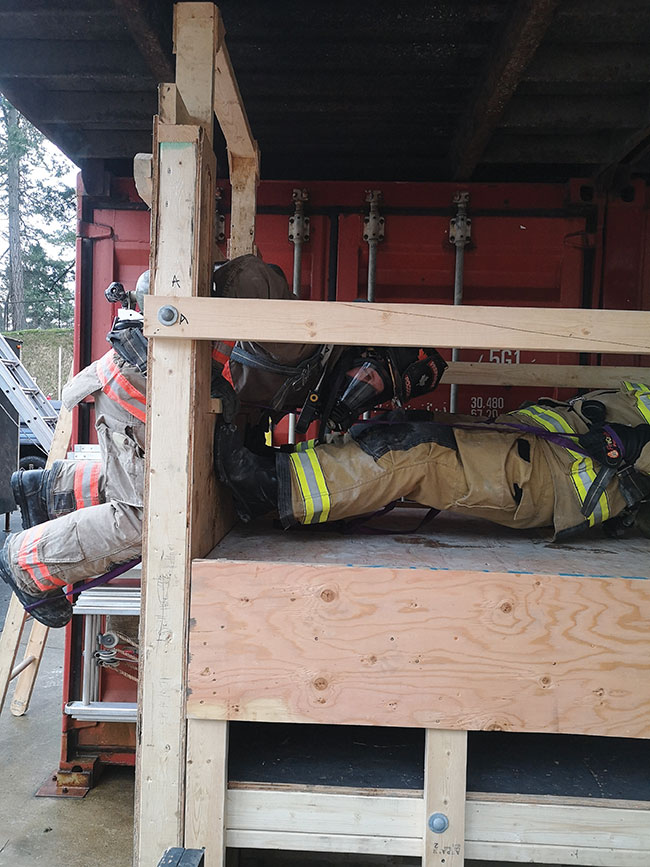
As the second firefighter pushes up off the knee, the first firefighter can now start to stand and pivot around to assist lifting the second firefighter up and out the window - Once outside, the firefighter then deploys their webbing and lowers it through the window. The outside firefighter positions themselves in a seated position facing towards the window, knees bent, so that the firefighter on the lift can drive out with their legs to lift the inside firefighter.
- The inside firefighter steps a foot into the webbing loop and grabs up onto the windowsill. Using the commands UP and DOWN the inside firefighter will instruct the outside firefighter to either raise up or lower down more webbing.
- Once webbing is in place, the commands ‘Ready, Ready, GO’ will be used. On ‘GO’ the outside firefighter drives with the legs and pulls back with the arms bringing the inside firefighter up and out the window.
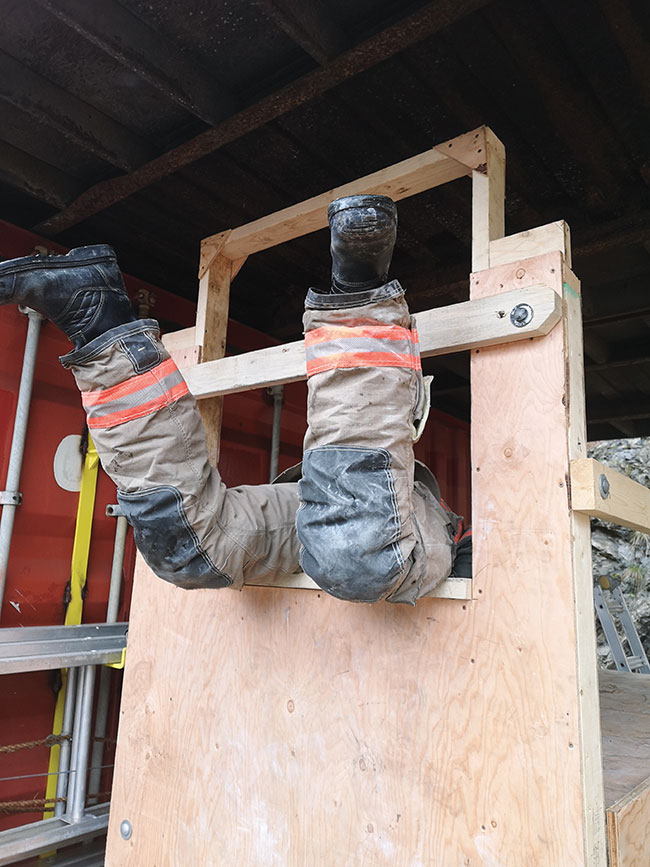
In all of these techniques, when you are pushing up out the window make sure to do it in a strong explosive movement. Always ensure to get your foot as high as possible when going to exit. You want it to be uncomfortably high to get your maximum height advantage when exiting.
As you exit the window, once you have the right height, it’s important to make sure you focus on staying low to the sill, pushing yourself out and not continuing to push yourself up into the top of the window. You want your body to keep contact with the bottom sill for the entire ride out. In larger basement windows you can make the exit with your SCBA still on. Keeping the SCBA on magnifies the importance of keeping low to the bottom sill. The bottle can contact the top sill and stop your momentum as you attempt to exit before you have your centre of gravity out the window.
If you have enough space to still make it out with your SCBA on but are just barely making it, a lot of these techniques are truly a game of inches; wherever we can get some the easier this is. It is always good practice to loosen our SCBA shoulder straps. This will allow your SCBA to slide down your back possibly giving you the extra inch or inches need to get your centre of gravity out the window.
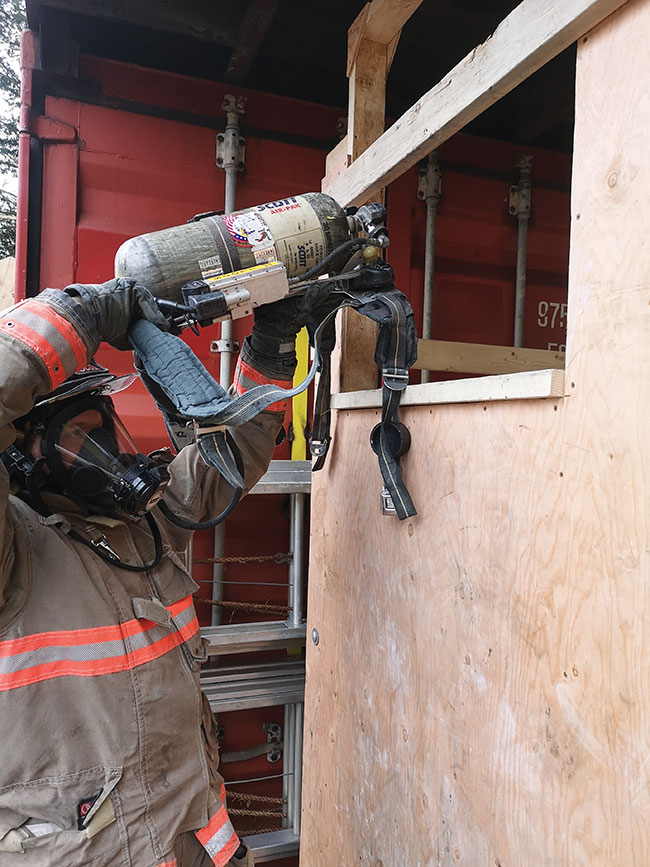
If the window is too small for you to get out with your pack on you will prepare your exit technique (ex. place halligan, tie webbing to right length) then remove your SCBA while keeping your face piece on and attached.
Pass the SCBA up and out the window stem of the bottle first to allow the maximum amount of hose to still come back into the window and not pull off your face piece. Once your pack is out the window use your prepared exit technique and exit in the same fashion as you would with your SCBA on. It is important to have attempted to exit with your SCBA still on before taking it off to commit to this technique so that in your first attempt you can have a look to see how far down the ground is on the outside of the window making sure that your SCBA isn’t pulled from your face as it drops to the ground on the far side of the window.
Knowing your gear is imperative. Centre mounted chest lights seem like a good idea at the time, but once you do these techniques or have a mayday patient that you are removing out a window, centre mounted chest lights take away valuable space. Look to keep the chest light high and to one side so that shoulders can be easily rolled one way or the other to get them past the sill, or consider removing them before attempting the exit.
Nathan Pocock is a career firefighter in British Columbia and a member of the technical rescue team and Canada task force one HUSAR team. He is the owner and operator of Prepare4, a fire fighting training company based in Vancouver.
Print this page